Virtual Staging Before and After: Real Examples and What to Look For
Updated September 27, 2026 · 5 min read
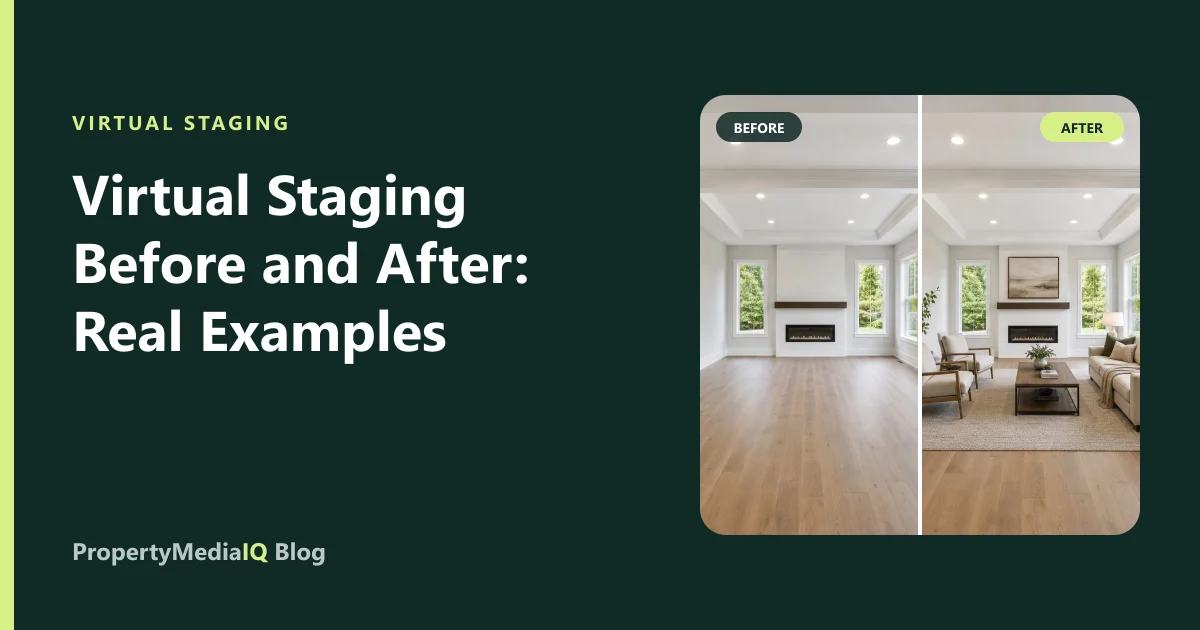
Nothing explains virtual staging faster than a before and after. An empty room becomes a home; a dated kitchen shows its potential; a flat daytime exterior becomes a glowing evening shot. But a good before-and-after also shows what didn't change — and that's what separates honest listing media from misleading edits.
Below are three real examples created with PropertyMediaIQ, what each changed, and why it works. Then: how to present before/afters on the MLS and on social media.
Example 1: Empty living room → virtually staged
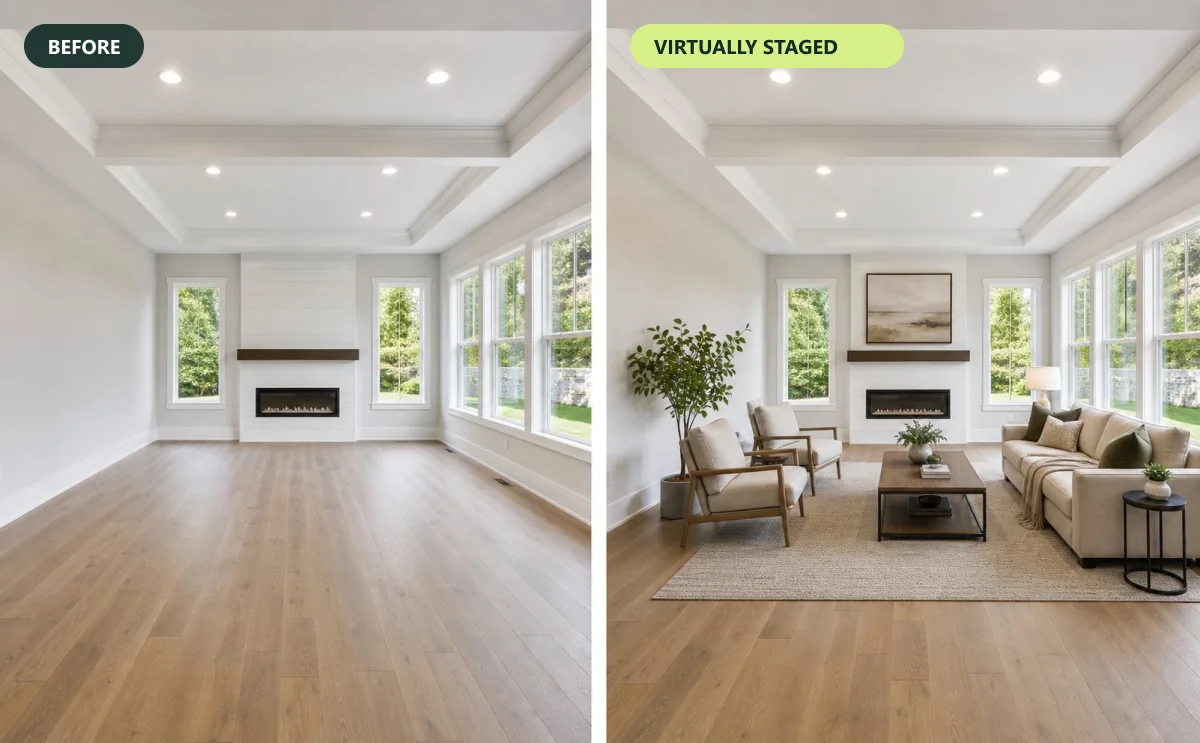
What changed: a sofa, two armchairs, a coffee table, a rug, a plant, a lamp and wall art.
What didn't: the coffered ceiling, recessed lights, windows, fireplace, mantel and wood flooring are exactly where they were.
Why it works:
- Scale becomes obvious. Buyers can see this room comfortably fits a full seating group.
- The layout is resolved. Furniture faces the fireplace, answering "where does the TV/sofa go?"
- The room feels warmer. Texture from the rug and upholstery softens the bare floor.
- The style is neutral. A light, transitional look appeals broadly without distracting from the room itself.
Cost: $5 with Property Media.
Example 2: Dated kitchen → remodel concept
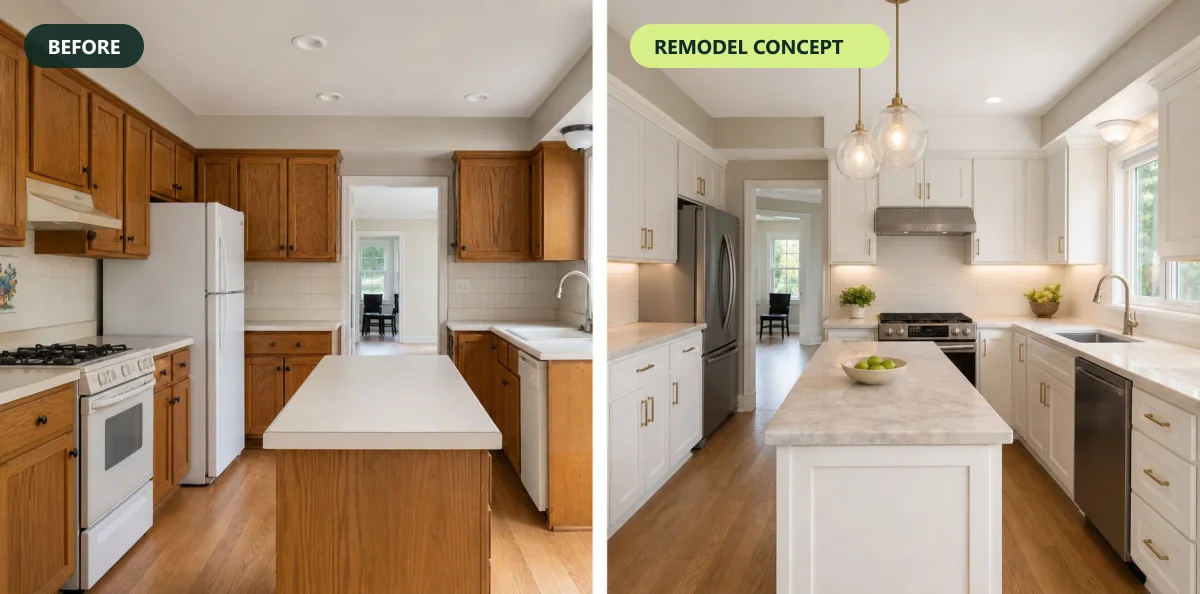
What changed: cabinet color and style, countertops, backsplash, hardware, appliances (white to stainless) and lighting (pendants over the island) — finishes and fixtures.
What didn't: the layout, island position, doorway and room footprint.
Why it works: a dated kitchen is one of the most common reasons buyers skip a listing. A concept shows what a realistic update could look like, turning "needs work" into "here's the plan."
Important: this is a renovation concept, not staging. It must be clearly labeled — "Renovation concept, does not show current condition" — always paired with the original, and never used as the main listing photo. Some MLSs don't allow concepts in the photo set at all; use them in your own marketing and buyer conversations instead. See kitchen remodel visualization.
Cost: $8 per photo.
Example 3: Daytime exterior → twilight
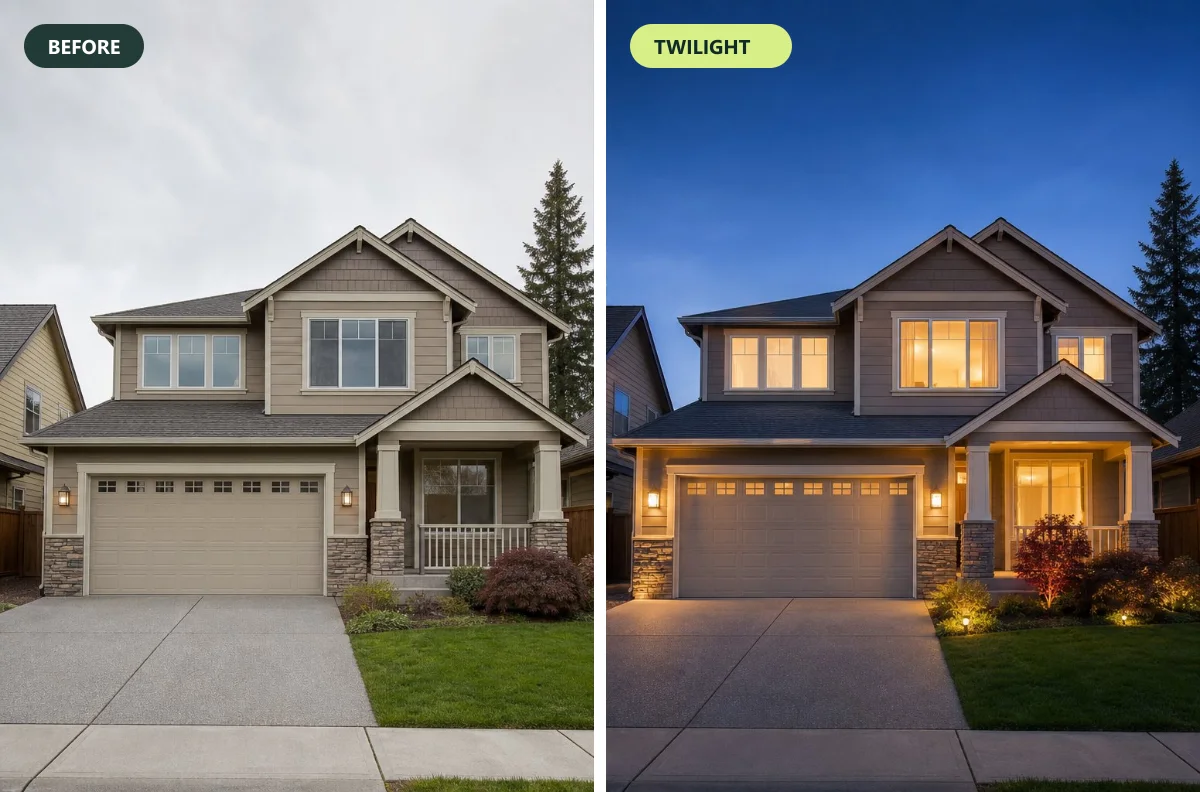
What changed: the sky, ambient light, window glow — and, note, small landscape path lights appeared in the garden bed.
What didn't: the house, roofline, driveway, trees and neighboring homes.
The review lesson: those path lights are exactly the kind of detail to check before publishing. If the property doesn't have them, request a revision or retouch them out — a twilight shot must not add fixtures the home doesn't have.
Why it works: twilight exteriors are among the most attention-grabbing listing images, and they're the natural opening frame for a listing reel. Converting a daytime shot avoids a second, time-sensitive photo session. More in twilight photography for real estate.
Cost: $2 per photo.
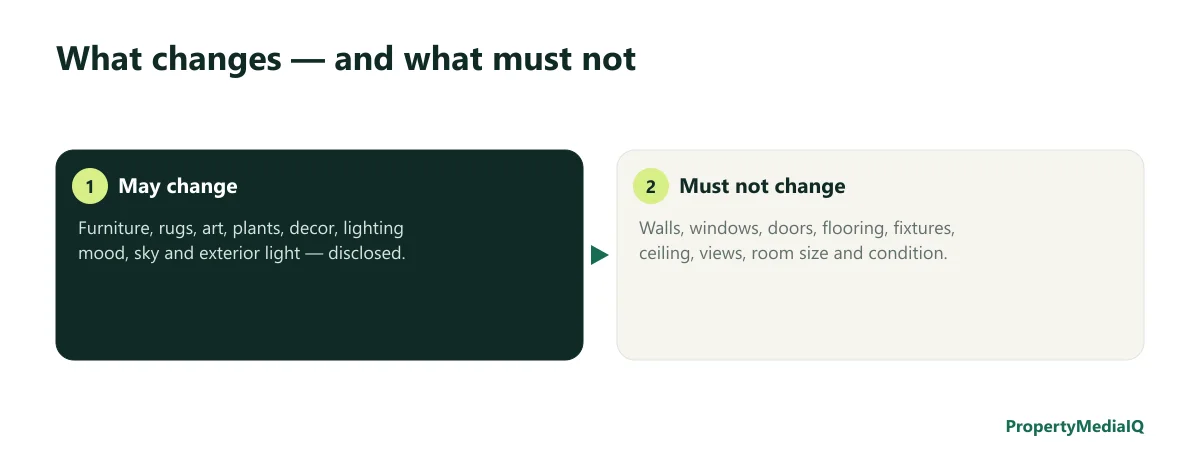
What may change — and what must not
| Edit | Acceptable when disclosed? |
|---|---|
| Adding furniture and decor | Yes |
| Removing furniture or clutter | Yes, if nothing that conveys is removed and no defects are hidden |
| Sky replacement, twilight, color correction | Yes |
| Renovation concepts | Only clearly labeled as concepts, paired with the original |
| Changing flooring, walls, windows, views, condition | No — presented as current, this misrepresents the property |
Full rules in MLS photo rules for virtual staging.
How to present before/afters on the listing
- Main photo set: use the staged version with a disclosure caption; include the original if your MLS requires it (or as good practice).
- Remarks: list which photos are virtually staged or enhanced.
- Concepts: keep out of the main set unless your MLS allows them; label clearly.
How to use before/afters on social media
Before/after content is some of the most engaging material agents can post — it's visual, immediate, and needs no explanation.
- Split screen or slider posts: original on the left, staged on the right.
- Reveal reels: start on the empty room, cut to the staged version, then a short clip with camera motion. Property Video turns the staged photo into an 8-second cinematic clip.
- Carousels: one room per slide, before then after.
- Always label "Virtually staged" or "Concept" on the image itself, since posts get shared without captions.
More formats in 20 real estate reel ideas.
How to get results like these
- Start with a wide, level, bright photo.
- Choose a style that fits the buyer.
- Generate a few variations and pick the most natural.
- Check architecture, scale and shadows.
- Disclose and keep the original.
Step-by-step: how to virtually stage a room.
Choosing the right treatment for each room
| Situation | Best treatment | Price |
|---|---|---|
| Empty room buyers can't picture | Virtual staging | $5 |
| Occupied room with dated furniture | Furniture removal + staging | $7 |
| Cluttered but well-furnished room | Declutter | $2 |
| Room that already shows well | Enhancement only | $2 |
| Dated kitchen or bath | Remodel concept (labeled) | $8 |
| Grey-sky exterior | Sky replacement | $2 |
| Hero exterior for launch | Twilight conversion | $2 |
Review checklist for every "after"
- Walls, windows, doors and ceiling unchanged.
- Flooring material and direction unchanged.
- Fixtures that convey are still there; nothing new has been added that doesn't exist (like the garden lights above).
- Views out of windows unchanged.
- Furniture scale and shadows believable.
- Label applied: "Virtually staged", "Digitally enhanced" or "Concept".
Frequently asked questions
Do virtually staged photos look real? Good ones do — realistic scale, perspective and shadows, with the room's architecture preserved.
Can I post before and after photos of my listing? Yes, with the seller's permission and clear labeling of edited images.
How much does it cost to get these results? Staging $5, twilight $2, remodel concepts $8 per photo with PropertyMediaIQ.
Create your own before and after
Try it on your own listing photo.
Stage, enhance, or renovate a photo in under two minutes — $5 per photo, no subscription required.